Geometric Unsharpness, Isotope Decay, and Film Calibration
Even the best radiography setup can deliver disappointing results if you overlook a few crucial factors. Veteran NDT technician Tim Starkey has seen it all; and he warns that without attention to geometric unsharpness, isotope half-life, and sensitometric calibration, you’ll end up with blurred images, wasted exposures, and endless retests. In this guide, we’ll dive into these advanced considerations so your next radiographic inspection yields crystal-clear accurate results.
Taming Geometric Unsharpness (UG) for Crisper Images
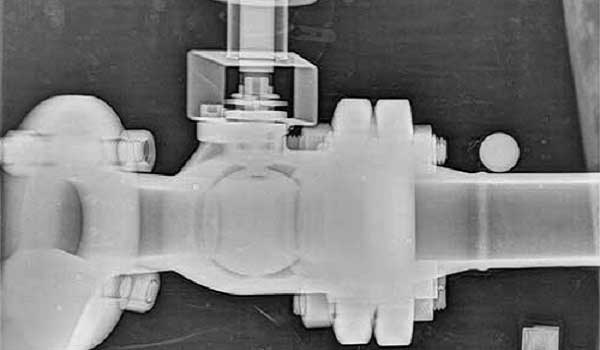
What It Is: Geometric unsharpness (UG) is the blurring that occurs because every radiation source has a finite focal spot. If unchecked, flaw edges appear softened or feathered, making it harder to distinguish real defects.
How to Minimize UG:
-
- Keep the Source Close, positioning your X-ray tube or gamma source as near the weld as safety allows. Every extra centimeter increases unsharpness.
-
- Align the Detector Parallel, making sure film or your digital panel sits perfectly parallel to the weld surface. Even a slight tilt magnifies UG. Alignment jigs or simple laser guides can help maintain true geometry.
By routinely checking distance and alignment before each exposure, you’ll capture sharper images and reduce false indications.
Planning Around Isotope Decay & Curie Strength
Understanding Half-Life: Radioisotopes like Iridium-192 lose activity over time; Ir-192 cuts in half every 74 days. If you treat the source like a constant flashlight, you risk underexposed films or wasted repeat shots.
Best Practices for Decay Management:
-
- Track Install Dates, logging each source’s activation date and calculating its remaining activity for every inspection.
-
- Maintain Overlapping Stocks, keeping at least one fresher source on hand so you can swap before activity drops below your minimum requirement.
-
- Adjust Exposure Times, planning, for example, twice the exposure when the activity has halved; verify with a quick step-wedge check before the day’s first exposure.
A systematic approach to isotope decay ensures consistent image density and avoids schedule disruptions.
Mastering Film Calibration & Sensitometric Curves
Why It Matters: Even with digital radiography gaining ground, film remains essential for many code-mandated inspections. The key to clear, high-contrast films lies in your sensitometric curve, the relationship between exposure and optical density.
Calibration Checklist:
-
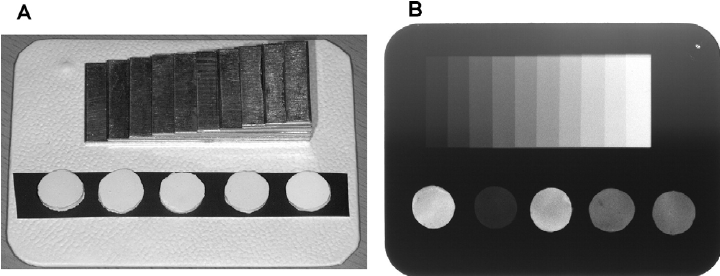
- Use a Step Wedge, carrying a small wedge to test film response at the start of each shift.
-
- Aim for Ideal Density, targeting an optical density between 1.2 and 2.0 for your mid-gray patch to reveal both subtle and pronounced defects.
-
- Control Contrast (Gamma), adjusting developer temperature or agitation to fine-tune contrast; a steeper curve highlights small flaws but can obscure mid-tone details.
-
- Log Parameters, recording film batch, developer settings, and step-wedge results; consistency is the cornerstone of reliable radiographs.
With regular calibration checks, you’ll eliminate ambiguous images and streamline your move to digital archiving (DICONDE).
Bringing It All Together: Your Radiography Field Checklist
Before every inspection, run through these four critical checks, geometry, source activity, calibration, and documentation:
-
-
Minimize source-to-weld distance and ensure detector alignment.
-
-
-
Verify current Curie strength and calculate correct exposure time.
-
-
-
Test film or digital settings with a step wedge, confirming density and contrast.
-
-
-
Record unsharpness alignment, isotope details, and calibration readings for traceability.
-
Following this simple checklist transforms each exposure into a dependable record of weld integrity.
Next Steps & Further Reading
For guidance on selecting between X-ray and gamma-ray methods, read X-Ray vs. Gamma Ray in Weld Inspection. Together these resources equip you to capture precise, high-quality radiographs no matter where your inspections take you.
At ScanTech, we’re translating decades of field experience into tomorrow’s scanner designs so you get both cutting-edge guidance and gear that’s truly built for the realities of NDT work. Reach out to discuss your toughest radiography challenges and Sign up for our Newsletter below to stay informed on our upcoming solutions.